|
|
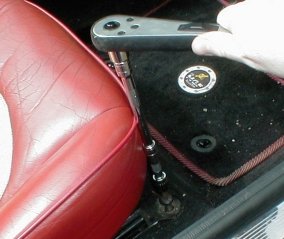
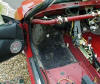
Seats - Removal
There are 4 bolts securing each seat to the floor pan. I also had to
unclip the multiplug to the seat belt pre-tensioner and undo a 5th
bolt, securing the seatbelt to the seat before I could remove it
from the car. IMPORTANT! If you are going to follow these
instructions, before you begin you need to disconnect the battery
(both terminals) and leave the car for a FULL ten minutes.
Because you need to disconnect the seatbelt pre-tensioner wiring
there is the possibility of firing them by accident if there is any
residual current in the wiring. Not a good idea as they contain
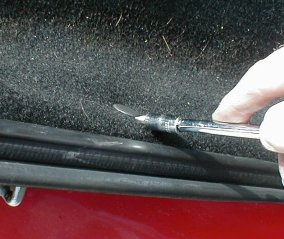
explosives. Anyway, warning out of the way, you will need a T50 Torx
bit and a ratchet with at least one extension to do this job. I
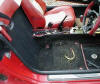
began with the front bolt as shown in the picture. |
Handy tip! I find it easiest to undo the second Torx
bolt by using 2 extension pieces to raise the ratchet above the
seat. |
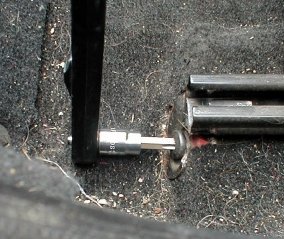
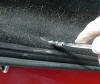
Now for the tricky ones, the third Torx bolt is horizontally fixed
and access is a bit limited. It is usually at this stage that I
start wondering to myself, "why are these bolts so long!" If you
think this one is bad, wait 'til you have a go at the next one!! |
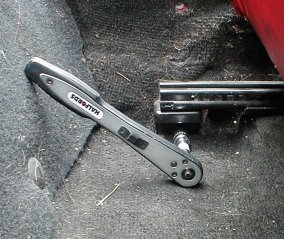
Another horizontal Torx bolt with limited access, only this one is
at arms length too! I really must get hold of a cordless
screwdriver. |
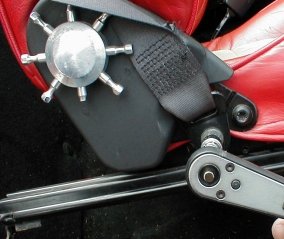
OK, with the four floor pan bolts undone, the seat is movable in the
car. Be careful though as it is still attached to the SRS wiring
loom underneath. You should now be able to move the seat enough to
get access to the 5th Torx bolt that secures the end of the seatbelt
to the seat itself. Handy tip! When moving the seat DO NOT lift the
seat slider handle, the two seat runners are independent of each
other and if they go out of line, re-fitting the seat later is more
tricky. :-) I undid the 5th bolt and then...... |
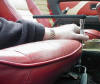
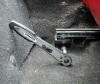
 .......unclipped
the red multiplug under the seat to the seat belt pre-tensioner.
Note the route of the wiring, it goes over the silver bar, this
prevents is becoming caught when the seat is re-fitted .......unclipped
the red multiplug under the seat to the seat belt pre-tensioner.
Note the route of the wiring, it goes over the silver bar, this
prevents is becoming caught when the seat is re-fitted |
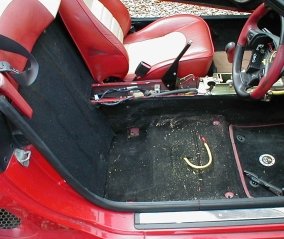
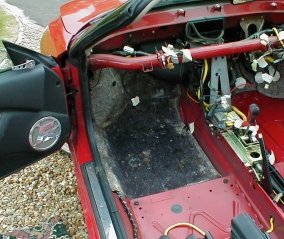
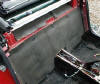
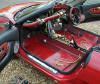
 This
is what the carpet under the seats looks like, please accept my
apologies for the mess it's difficult to hoover under the seat in an
F! This
is what the carpet under the seats looks like, please accept my
apologies for the mess it's difficult to hoover under the seat in an
F! |
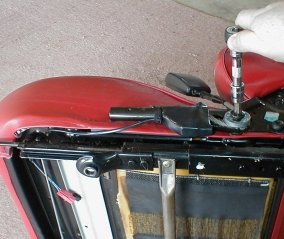
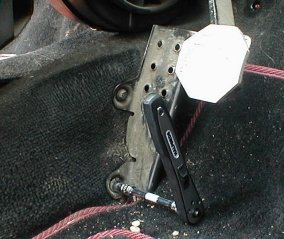
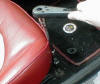
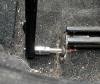
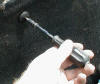
 The
seatbelt clip (including the pre-tensioner) in the F has been known
to break, preventing the seatbelt from clipping home. I have
replaced the driver's side one twice in the 100,000 miles or so
since I bought the car and this is an additional step to the seat
removal instructions showing how this part is replaced. Note the
route of the wiring around the edge of the seat and underneath. To
remove the pre-tensioner, simply undo the T50 Torx bolt as shown in
the picture, unclip the wiring, position the new one and replace the
bolt. This picture was taken specifically for this note, I have no
need to replace Scarlet's pre-tensioner (at the moment), but I
thought that whilst i had the seats out it would be opportune to
take this picture for the web. Ain't I good to you? The
seatbelt clip (including the pre-tensioner) in the F has been known
to break, preventing the seatbelt from clipping home. I have
replaced the driver's side one twice in the 100,000 miles or so
since I bought the car and this is an additional step to the seat
removal instructions showing how this part is replaced. Note the
route of the wiring around the edge of the seat and underneath. To
remove the pre-tensioner, simply undo the T50 Torx bolt as shown in
the picture, unclip the wiring, position the new one and replace the
bolt. This picture was taken specifically for this note, I have no
need to replace Scarlet's pre-tensioner (at the moment), but I
thought that whilst i had the seats out it would be opportune to
take this picture for the web. Ain't I good to you? |
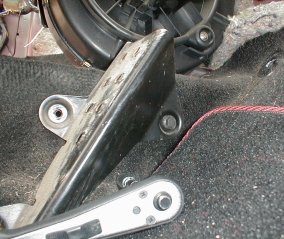
 Once
I had done the driver's seat, I repeated the procedure for the
passenger one. Once
I had done the driver's seat, I repeated the procedure for the
passenger one. |
Carpets - Removal
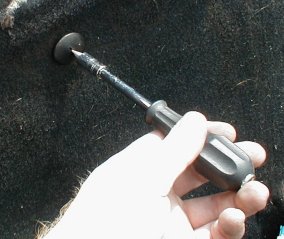
 Using
a flat headed screwdriver, unscrew the plastic retaining clips. There
are 9 large ones... Using
a flat headed screwdriver, unscrew the plastic retaining clips. There
are 9 large ones... |
 ...and
2 pairs of smaller ones near the door jambs. Use the screwdriver again
to prise these ones out. ...and
2 pairs of smaller ones near the door jambs. Use the screwdriver again
to prise these ones out.
A proper trim tool can be purchased from Halfords which makes short
work of removing trim panel clips. |
 With
the retaining clips removed, I could now take out the rear carpet and
reveal the sound deadening material behind. This is retained with
conical trim clips that use the same mounting points as the carpet
ones I have just removed. With
the retaining clips removed, I could now take out the rear carpet and
reveal the sound deadening material behind. This is retained with
conical trim clips that use the same mounting points as the carpet
ones I have just removed. |
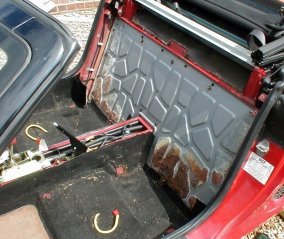
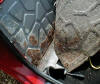 A
while ago on the BBS Tom Randell reported rust on his rear panel and I
have been meaning to check Scarlet's one ever since. One of those jobs
you know, the kind that never seems to get done! Anyway, this is the
reason I stripped out the rear carpet today and although I alluded to
the fact that this was a nasty surprise in the introduction to this
gallery I had half expected to find this, although I wasn't expecting
it to be quite so bad. A
while ago on the BBS Tom Randell reported rust on his rear panel and I
have been meaning to check Scarlet's one ever since. One of those jobs
you know, the kind that never seems to get done! Anyway, this is the
reason I stripped out the rear carpet today and although I alluded to
the fact that this was a nasty surprise in the introduction to this
gallery I had half expected to find this, although I wasn't expecting
it to be quite so bad. |
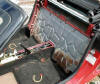 With
the rear sound deadening material fully out the extent of the rust can
clearly be seen. I am going to have to replace this panel as part of
the rebuild (it'll appear in the parts required section shortly after
I finish uploading this gallery) and i am going to paint the new one
before it goes in. With
the rear sound deadening material fully out the extent of the rust can
clearly be seen. I am going to have to replace this panel as part of
the rebuild (it'll appear in the parts required section shortly after
I finish uploading this gallery) and i am going to paint the new one
before it goes in. |
 My
attention then turned to the carpet in the floorpan, I began by
partially removing the door rubbers to release the edge of the carpet.
It is supposed to be secured with Velcro, but after 7 years the glue
on the back of Scarlet's had given up the ghost. My
attention then turned to the carpet in the floorpan, I began by
partially removing the door rubbers to release the edge of the carpet.
It is supposed to be secured with Velcro, but after 7 years the glue
on the back of Scarlet's had given up the ghost. |
 There
are a pair of (the smaller type) trim clips to be released along the
transmission tunnel (prise out with a flat bladed screwdriver) and a
pair of the larger type trim clips behind the pedals (unscrew with a
flat bladed screwdriver). I then needed to undo the three 8mm bolts
that secure the driver's foot rest. There are two obvious ones in the
front and... There
are a pair of (the smaller type) trim clips to be released along the
transmission tunnel (prise out with a flat bladed screwdriver) and a
pair of the larger type trim clips behind the pedals (unscrew with a
flat bladed screwdriver). I then needed to undo the three 8mm bolts
that secure the driver's foot rest. There are two obvious ones in the
front and... |
 ...a
third 8mm behind the foot rest. To be honest I am amazed this picture
came out, it was another 'point, click and hope' shot!! ...a
third 8mm behind the foot rest. To be honest I am amazed this picture
came out, it was another 'point, click and hope' shot!! |
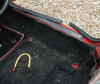
 You
can now remove the carpet, it just lifts out and the drivers' side is
a separate piece to the passenger side. Underneath the carpet is a
pair of sound deadening quilts / underlay, these also just lift out. You
can now remove the carpet, it just lifts out and the drivers' side is
a separate piece to the passenger side. Underneath the carpet is a
pair of sound deadening quilts / underlay, these also just lift out. |
 I
then removed the passenger side carpet in exactly the same way (minus
the foot rest - obviously!) On the passenger side the underlay was
saturated. Fs tend to leak around the heater box seal where it passes
through the front bulkhead, this is obviously what has been happening
in Scarlet and I therefore need to sort this out during the rebuild I
then removed the passenger side carpet in exactly the same way (minus
the foot rest - obviously!) On the passenger side the underlay was
saturated. Fs tend to leak around the heater box seal where it passes
through the front bulkhead, this is obviously what has been happening
in Scarlet and I therefore need to sort this out during the rebuild |
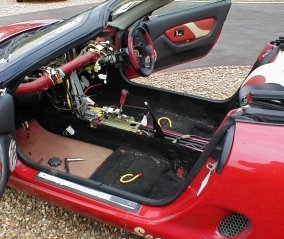
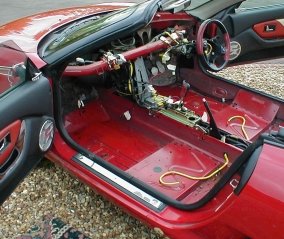
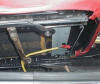
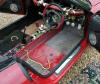
 Last
image, the interior strip out is nearly done now, there are still a
couple of items on the front bulkhead to remove, but in general it is
pretty much there now. I may put the driver's seat back when the front
wheel goes on, when this is done i should be able to move the car
under it's own steam and I intend to put her away in the garage. Last
image, the interior strip out is nearly done now, there are still a
couple of items on the front bulkhead to remove, but in general it is
pretty much there now. I may put the driver's seat back when the front
wheel goes on, when this is done i should be able to move the car
under it's own steam and I intend to put her away in the garage. |
|
|