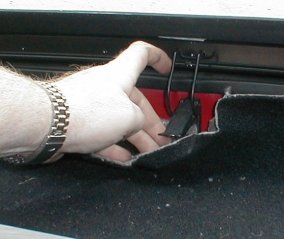
Well,
to all you budding MGF DIY'ers out there this next little piece will
be 'old hat'. The next job I completed was the removal of the parcel
shelf lining, to do this you need to unclip the back of the hood,
peel back the lining to reveal the 5 over centre catches and undo
them, one-by-one. PeteVick - I've found that by using a
screwdriver to flick the catches up, it safes your knuckles from
being knocked when the catch springs open Well,
to all you budding MGF DIY'ers out there this next little piece will
be 'old hat'. The next job I completed was the removal of the parcel
shelf lining, to do this you need to unclip the back of the hood,
peel back the lining to reveal the 5 over centre catches and undo
them, one-by-one. PeteVick - I've found that by using a
screwdriver to flick the catches up, it safes your knuckles from
being knocked when the catch springs open |
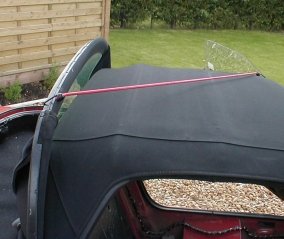
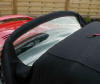 With
the hood clips undone, you can now pull the rear screen upwards as
shown in the picture. It may need a certain amount of force to pull
the hood out of its seating. With
the hood clips undone, you can now pull the rear screen upwards as
shown in the picture. It may need a certain amount of force to pull
the hood out of its seating. |
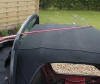 Once
the rear of the hood is folded up, I secured it in this position to
keep it out of the way. There are instructions on the web that
suggest a piece of string around the window rubber for this job, but
I always use a length of bungee cord. I find this easier to use and
therefore I always carry it around with me in the boot. I secure it
across the corners of the hood as shown in the picture. Once
the rear of the hood is folded up, I secured it in this position to
keep it out of the way. There are instructions on the web that
suggest a piece of string around the window rubber for this job, but
I always use a length of bungee cord. I find this easier to use and
therefore I always carry it around with me in the boot. I secure it
across the corners of the hood as shown in the picture. |
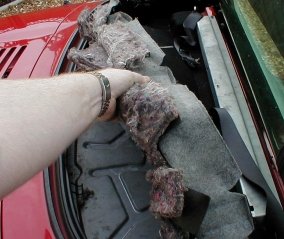
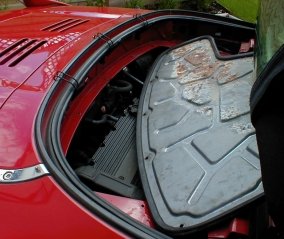
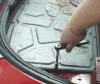
 With
the rear of the hood secured out of the way, pull the parcel shelf
'carpet' out and then grasp the parcel shelf sound deadening
material and withdraw rearwards to reveal the engine bay inspection
cover. The vertical bits of the sound deadening material may become
detached from the main part. With
the rear of the hood secured out of the way, pull the parcel shelf
'carpet' out and then grasp the parcel shelf sound deadening
material and withdraw rearwards to reveal the engine bay inspection
cover. The vertical bits of the sound deadening material may become
detached from the main part. |
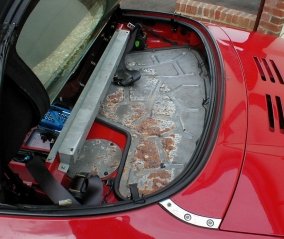
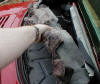
 Eeeek,
more rust!! I have known about this surface rust on the inspection
panel for a while now, it isn't a problem and is a consequence of a
leaky hard top (around the rear screen). Doing the rebuild has given
me time and access to think about repairs, maintenance and
modifications and I was just going to paint this panel in a similar
manner to the rear panel in the cabin, but if I can get hold of a
suitable piece of toughened glass (for a reasonable amount of
money), I might replace the inspection panel so that Scarlet's
engine is on view. What do you think is this a good idea? Eeeek,
more rust!! I have known about this surface rust on the inspection
panel for a while now, it isn't a problem and is a consequence of a
leaky hard top (around the rear screen). Doing the rebuild has given
me time and access to think about repairs, maintenance and
modifications and I was just going to paint this panel in a similar
manner to the rear panel in the cabin, but if I can get hold of a
suitable piece of toughened glass (for a reasonable amount of
money), I might replace the inspection panel so that Scarlet's
engine is on view. What do you think is this a good idea? |
 Next,
removal of the engine bay inspection panel. Using a 10mm socket,
undo and remove the 11 retaining bolts around the perimeter of the
inspection panel. If you have a MY2K MGF then to get access to the
front three bolts under the speaker box, you will need a 10mm
ratchet spanner as well. If you have a TF, you will also need the
ratchet spanner and due to the engine bay braces, there are an
additional two 10mm bolts to remove (making 13 in total on a TF). Next,
removal of the engine bay inspection panel. Using a 10mm socket,
undo and remove the 11 retaining bolts around the perimeter of the
inspection panel. If you have a MY2K MGF then to get access to the
front three bolts under the speaker box, you will need a 10mm
ratchet spanner as well. If you have a TF, you will also need the
ratchet spanner and due to the engine bay braces, there are an
additional two 10mm bolts to remove (making 13 in total on a TF). |
 The
engine cover is now free and can be lifted out. I was able to do
this from the front, but you will need to take it out the back due
to the T-Bar being in the way. This is a tight fit on an F, but is
extremely tight on a MY2K F / TF due to the speaker box. The
engine cover is now free and can be lifted out. I was able to do
this from the front, but you will need to take it out the back due
to the T-Bar being in the way. This is a tight fit on an F, but is
extremely tight on a MY2K F / TF due to the speaker box. |
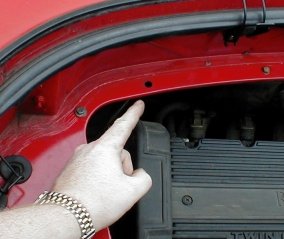
 Noticed
something interesting when I removed the engine bay cover, it
appears that the TF engine bay braces make use of existing holes in
the bodywork as Scarlet has them. This could mean that they were
always meant to be included and were deleted from the F or it could
be that these holes were for something else and the TF just makes
use of them. Either way it is an interesting discovery as it means
that fitting the braces to an MGF is a reasonable proposition. Noticed
something interesting when I removed the engine bay cover, it
appears that the TF engine bay braces make use of existing holes in
the bodywork as Scarlet has them. This could mean that they were
always meant to be included and were deleted from the F or it could
be that these holes were for something else and the TF just makes
use of them. Either way it is an interesting discovery as it means
that fitting the braces to an MGF is a reasonable proposition. |
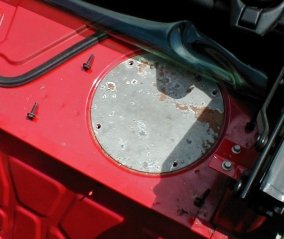
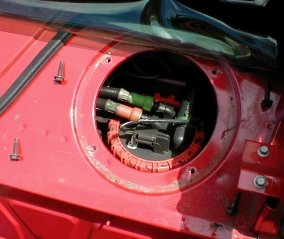
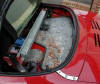
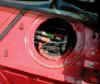
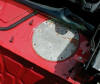 PeteVick
- The other smaller circular panel to the near side of the parcel
shelf (shown in the first picture) covers the petrol tank sender
unit. Once the four 10mm bolts and the panel have been removed, the
sender unit can be accessed as shown in the second picture. PeteVick
- The other smaller circular panel to the near side of the parcel
shelf (shown in the first picture) covers the petrol tank sender
unit. Once the four 10mm bolts and the panel have been removed, the
sender unit can be accessed as shown in the second picture.
 |