|
|
Steering Column Cowl - Removal
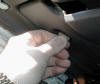
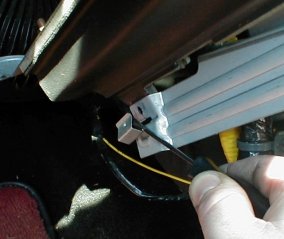
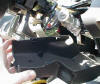
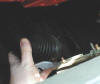
Begin by opening the fuse panel which is located under the steering
wheel. I always use a coin for this, in this case a 20 pence piece. |
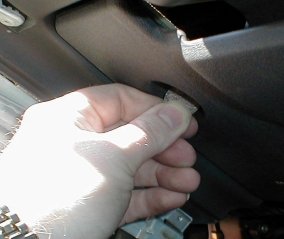
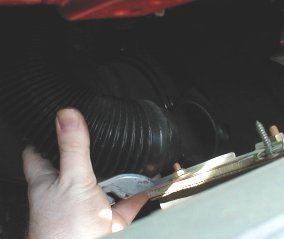
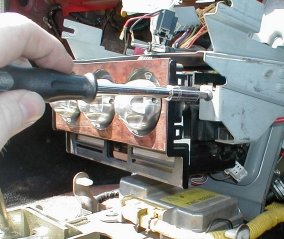
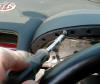
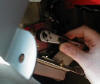
With the fuse panel beneath the steering wheel open, using a Philips
head screwdriver, undo and remove the first of the three retaining
screws. |
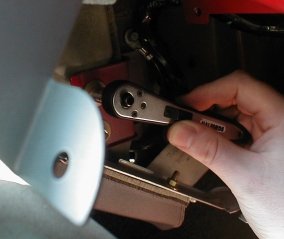
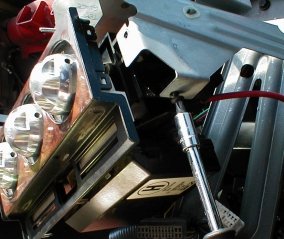
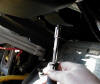
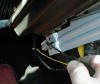
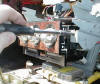
This picture shows the second of the three screws I needed to undo in
order to remove the steering column cowl. The third one is adjacent to
it. |
The cowl clips together and the three screws merely attach it to the
steering column. Prise apart the two halves and remove the top part
first. |
The reason for removing the top part first is because the bottom part
slots over the ignition and needs a little more manoeuvring to remove. |
|
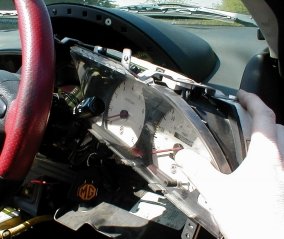
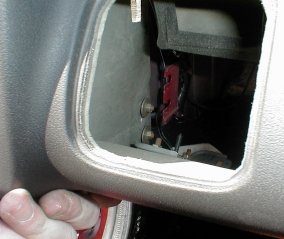
Instrument Pack - Removal
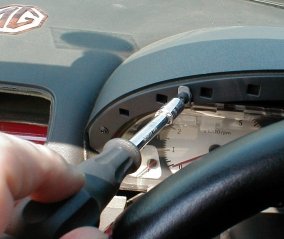
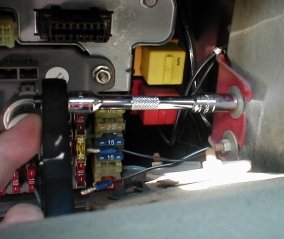
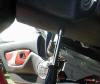
The next job I completed was the removal of the instrument pack. To do
this job I needed a Philips head screwdriver to undo the 4 retaining
screws, I also had to remove the steering column cowl so that I had
enough space to slide the pack out of its' mounting. This picture
shows one of the top retaining screws, there is another like it on the
other side of the binnacle, both needed removing. |
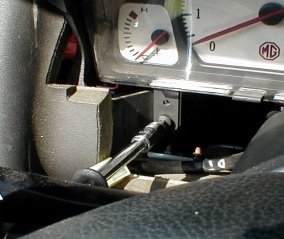
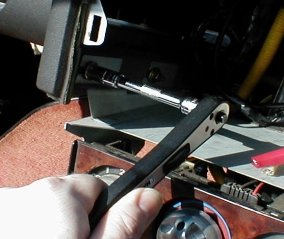
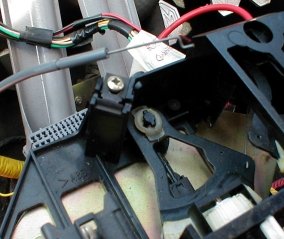
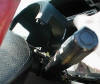
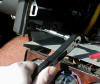
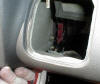
This picture shows one of the two lower retaining screws. I had to
remove both of the lower screws (one each side of the steering
column). |
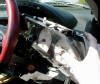
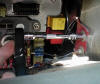
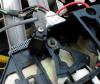
Now for the tricky part! There are three multiplugs and the speedo
cable to disconnect before you can remove the instrument pack, this is
a fiddly job and I found it impossible to take photos of it because
you are working behind the pack by feel. The next photograph shows the
back of the instrument pack and I have ringed in red the locations of
the multiplugs, hopefully if you need to follow these instructions the
photo will help. |
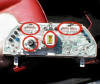
This picture shows the back of the instrument pack, the red circles
have been added by me and show the locations of the three multiplugs
and the speedo cable attachment. |
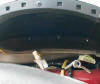
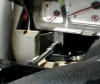
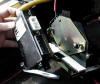
This last image shows the inside of the binnacle. I took it in
response to a recent thread on the MGF BBS Technical forum which
concerned the mounting of the instrument binnacle. It looks to me like
it is retained from below and behind, making removal extremely
difficult insitu. |
|
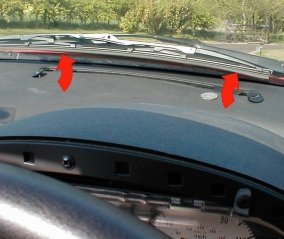
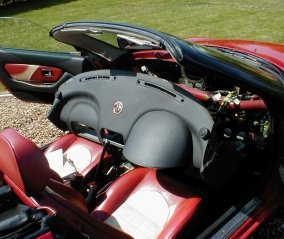
Dashboard - Removal

The main event! Begin by using a coin (I used a 20 pence piece) and
turning the cover caps on the windscreen demister vents through
approximately 30 degrees. The image has arrows on it to show the
direction to turn them. |
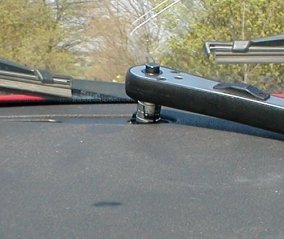
Using an 8mm socket and a very small ratchet (I used a 1/4 drive on
Mike Satur's recommendation), slacken off the 4 concealed bolts. This
is a bit of a tricky job as access is very limited, my advice here is
use the ratchet for as long as possible, then detach it from the
socket and, with the socket still located on the bolt, work it undone
with your fingers. |
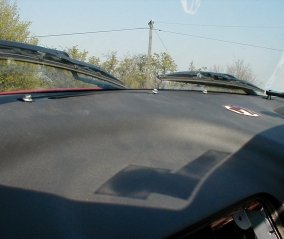
All four bolts undone, the next step is to lift them out of the vents
and place them aside with the cover caps. |
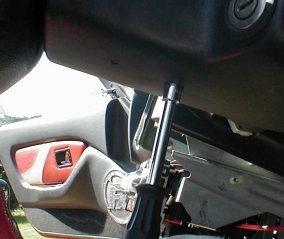
Whilst we are on the subject of the windscreen demister vents, the
next step is to disconnect the hoses that feed them from the main
heater box below the dash. There is one for each side and the image
shows me disconnecting the passenger side one. |
OK, with the four 8mm bolts in the air vents and the hoses under the
dash removed, I next slackened off the pair of 8mm retaining nuts on
the passenger side of the car. The picture sort of shows you what I
did, but I took it through the space where the passenger air bag blank
was and it hasn't come out entirely satisfactorily. The next image
shows the same nuts but on the drivers' side, this one is clearer. |
This picture shows the drivers' side dash retaining nuts. Taken
through the opening for the drivers' side air vent, this photo came
out a lot better and you can see the nuts quite clearly. I needed a
short extension in addition to the 8mm socket to slacken these off. |
After slackening off the four side nuts (no need to remove them), I
then performed the same operation on the four 8mm nuts inside the
centre console (a pair each side) |
In addition to the central nuts there are also a pair of spring clips,
both needed releasing and I used a small flat bladed screwdriver for
this job. |
With the central nuts slackened and the bottom clips removed it is
possible to work the heater control panel module out of the dash. |
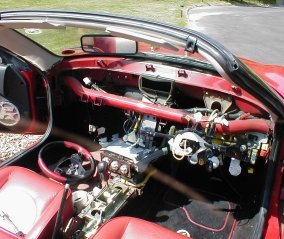
IMPORTANT! Everything is now released, but you still can't get the
dash out of the car because the steering wheel is in the way. Mike
Satur recommended releasing the steering column so that it drops,
wheel and all, out of the way. With the wheel out of the way, you can
pull the dash out of the side bolts. |
Work the side bolts and the central bolts out and then rotate the dash
forwards so that the air vent hoses thread their way up and out, you
can now remove the dash from the car. |

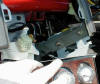
With the dash out the car will look like this - Ahhh poor Scarlet !! |
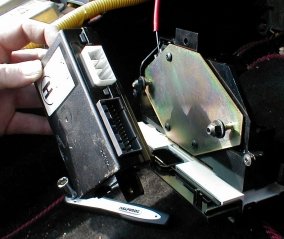
Heater Control Panel - Removal
The next job I did today was the removal of the switch panel for the
heater. The first step was to release the panel from the dash module
by undoing all four screws... |

Now that the dash is removed, this is much easier as you can manoeuvre
the entire module to get good access to the fixtures. The picture
shows the second screw, there are another pair on the other side. |
The next step is to unclip all the multiplugs to this module, there
are two to the heater control panel and a further two to the black box
(anti-theft alarm ECU) underneath. The temperature control and
distribution knobs on the heater panel are attached to a pair of wires
that operate the heater gubbins. The wires are attached to the heater
panel by being bent into a Z shape, to release the vent distribution
wire you first need to release the retaining clamp by undoing the
screw shown in the picture with a Philips head screwdriver, you can
them work the wire out of it's hole. |
The temperature control wire is a little more tricky, not only do you
have to release the clamp, but you also need to take off the metal
plate on the underside, and to do this you need to remove the black
box. Tools for this job are the 8mm socket and ratchet and both a
Philips head and a flat headed screwdriver. The wire can now be worked
out of it's hole and the panel is now free of the car. |
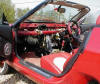
Lastly, the usual 'final' picture of the day. I am quite pleased with
my progress so far, future jobs include stripping out the heater
components and carpets, this latter job will entail seat removal. |
|
|