|
|
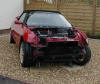
Under Bonnet Panel - Removal
 All
the trim has now been removed from the cabin, there are a few items
left like the pedal box, heater unit, loom, fusebox and the gear
selector, but in general it is now empty. So I decided to make a start
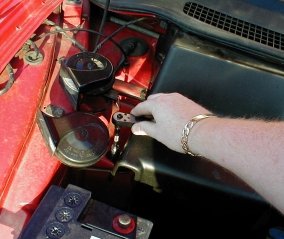
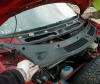
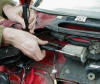
under the front bonnet, beginning with the shroud panel. I have
removed Scarlet's shroud panel a number of times because it conceals
the valves for the Hydragas suspension. I began by using a 10mm socket
on a ratchet to remove the pair of plastic nuts to the left, near the
horns. All
the trim has now been removed from the cabin, there are a few items
left like the pedal box, heater unit, loom, fusebox and the gear
selector, but in general it is now empty. So I decided to make a start
under the front bonnet, beginning with the shroud panel. I have
removed Scarlet's shroud panel a number of times because it conceals
the valves for the Hydragas suspension. I began by using a 10mm socket
on a ratchet to remove the pair of plastic nuts to the left, near the
horns. |
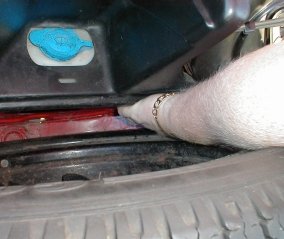
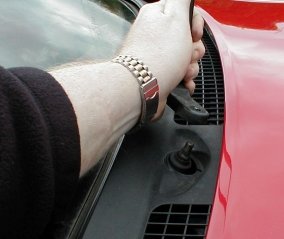
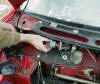
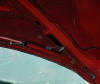
 Before
you start, yes it WAS difficult taking this picture! :-) At the bottom
of the shroud panel is a pair of studs, I needed to pull the panel off
of them (one each side of the spare tyre well). You may find this
easier with the tyre removed. Before
you start, yes it WAS difficult taking this picture! :-) At the bottom
of the shroud panel is a pair of studs, I needed to pull the panel off
of them (one each side of the spare tyre well). You may find this
easier with the tyre removed. |
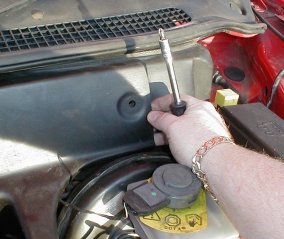
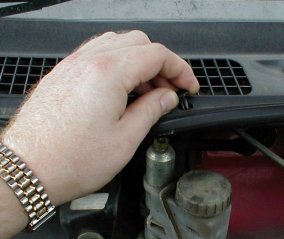
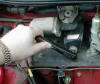
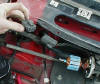
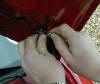
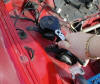
 Using
a Philips head screwdriver the next task is to undo the plastic
retaining screw above the brake master cylinder. Be careful, if you
drop it it's a right pain to find again! Using
a Philips head screwdriver the next task is to undo the plastic
retaining screw above the brake master cylinder. Be careful, if you
drop it it's a right pain to find again! |
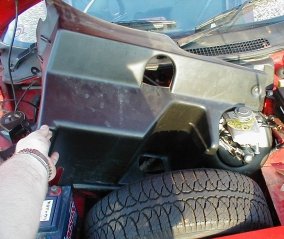
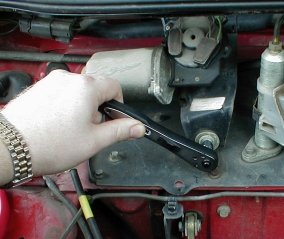
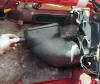
 All
the bolts/screws have now been removed, I was able to work the panel
out of the under bonnet area to reveal... All
the bolts/screws have now been removed, I was able to work the panel
out of the under bonnet area to reveal... |
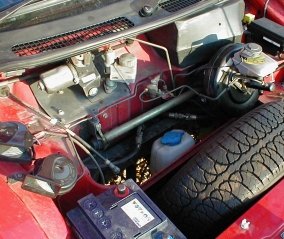
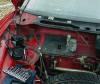
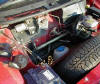 ...The
hydragas valves - each side of the windscreen washer bottle. These
valves are used to adjust the ride height of the car using a Hydragas
pump. Right, that's enough from me for now - i'm sick of working on
MG's for this weekend! ...The
hydragas valves - each side of the windscreen washer bottle. These
valves are used to adjust the ride height of the car using a Hydragas
pump. Right, that's enough from me for now - i'm sick of working on
MG's for this weekend!
NOTE - you will not find hydragas valves on a TF....but you knew
that....didn't you. |
|
Scuttle Finisher - Removal
 It
makes a change to see someone else's hands in the photos. As you can
see Tim is removing the screw covers with a (very) small flat bladed
screwdriver. He has also removed the plastic cover to the retaining
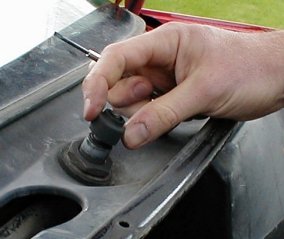
nut on the wiper spindle It
makes a change to see someone else's hands in the photos. As you can
see Tim is removing the screw covers with a (very) small flat bladed
screwdriver. He has also removed the plastic cover to the retaining
nut on the wiper spindle |
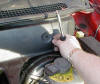
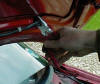
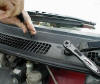 Using
a Philips head screw driver remove all the retaining screws. Also,
using a ratchet and a 10mm socket, undo and remove the retaining nut
on each wiper spindle as shown in the picture. Using
a Philips head screw driver remove all the retaining screws. Also,
using a ratchet and a 10mm socket, undo and remove the retaining nut
on each wiper spindle as shown in the picture. |
 We
then closed the bonnet and removed the wiper blades. Hmmm, that's not
one of Tim's hands - it must be one of mine! We
then closed the bonnet and removed the wiper blades. Hmmm, that's not
one of Tim's hands - it must be one of mine! |
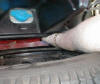
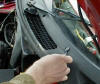
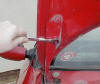
 Open
the bonnet again, and remove the press studs under the rubber seal,
they should just push out from below (or prise out from above in a
couple of locations) - nearly there now. Open
the bonnet again, and remove the press studs under the rubber seal,
they should just push out from below (or prise out from above in a
couple of locations) - nearly there now. |
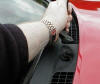
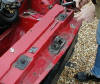
 The
finisher is now free of the car, there is a rubber 'hook' on each end
(shown on the far left of the picture) that needs to be negotiated
around the bonnet hinge, but other than this it can just be lifted off
the car. Hey, we're both in this shot. The
finisher is now free of the car, there is a rubber 'hook' on each end
(shown on the far left of the picture) that needs to be negotiated
around the bonnet hinge, but other than this it can just be lifted off
the car. Hey, we're both in this shot. |
|
Wiper Motor - Removal
 With
a ratchet and a 13mm socket, undo the lower retaining nut as shown. With
a ratchet and a 13mm socket, undo the lower retaining nut as shown. |
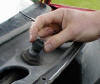 Slide
off the spacer on the wiper spindles. Slide
off the spacer on the wiper spindles. |
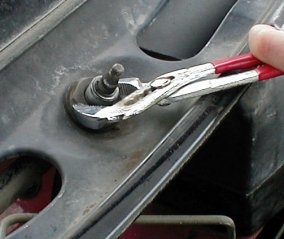
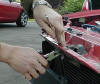
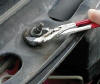 The
next step is to undo the large retaining nut on the spindles, we
didn't have a large enough spanner for this job, but they weren't very
tight so we were able to use a set of offset pliers. The
next step is to undo the large retaining nut on the spindles, we
didn't have a large enough spanner for this job, but they weren't very
tight so we were able to use a set of offset pliers. |
 This
is a tip from Tim, the next step was to remove the cover to the wiper
motor by undoing the two T20 Torx screws - the reason for this will
become clear shortly... This
is a tip from Tim, the next step was to remove the cover to the wiper
motor by undoing the two T20 Torx screws - the reason for this will
become clear shortly... |
 ...The
cover contains a pair of large magnets, with it in place you cannot
move the wiper bar as you are working against the motor. With the
cover removed you can then spin the motor and wind the bar across so
that becomes possible to lift the assembly out of it's mounting - nice
one Tim. ...The
cover contains a pair of large magnets, with it in place you cannot
move the wiper bar as you are working against the motor. With the
cover removed you can then spin the motor and wind the bar across so
that becomes possible to lift the assembly out of it's mounting - nice
one Tim. |
 With
the motor wound on and the bar's position adjusted, all that remains
now is to disconnect the multiplug as shown and... With
the motor wound on and the bar's position adjusted, all that remains
now is to disconnect the multiplug as shown and... |
 ...lift
the entire assembly out of the car. ...lift
the entire assembly out of the car. |
|
Bonnet - Removal
 We
began by removing the under bonnet light, it should just prise out,
but is fairly brittle so if you are following this, you need to be
careful as it is easy to break. If you have a TF, this is an
unnecessary step as the under bonnet light is one of a few deleted
items in the specification of the two cars. We
began by removing the under bonnet light, it should just prise out,
but is fairly brittle so if you are following this, you need to be
careful as it is easy to break. If you have a TF, this is an
unnecessary step as the under bonnet light is one of a few deleted
items in the specification of the two cars. |
 Thread
the under bonnet light wiring out of the bonnet and unclip the
retaining stud. This is quite tricky to remove, we had to use a small
flat bladed screwdriver in order to avoid damaging it. Thread
the under bonnet light wiring out of the bonnet and unclip the
retaining stud. This is quite tricky to remove, we had to use a small
flat bladed screwdriver in order to avoid damaging it. |
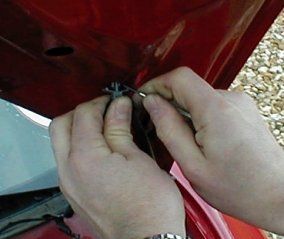
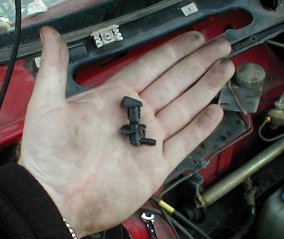
 The
next stage is to detach the washer jets. These are a two piece item
that work like a rawl plug, in so far as the inner piece squeezes the
outer 'grommet' into the hole, thus keeping it in place. We used a
pair of pliers to remove them both. The
next stage is to detach the washer jets. These are a two piece item
that work like a rawl plug, in so far as the inner piece squeezes the
outer 'grommet' into the hole, thus keeping it in place. We used a
pair of pliers to remove them both. |
 This
picture shows the washer jet removed from the car, you can see the
flat grommet around the jet and hopefully get a better idea of how it
is fixed. The grommet also acts as a gasket, sealing the jet to the
bonnet and (hopefully) preventing trapped water against the bodywork.
We also unclipped the hose from the underside of the bonnet - all the
clips just pull out. This
picture shows the washer jet removed from the car, you can see the
flat grommet around the jet and hopefully get a better idea of how it
is fixed. The grommet also acts as a gasket, sealing the jet to the
bonnet and (hopefully) preventing trapped water against the bodywork.
We also unclipped the hose from the underside of the bonnet - all the
clips just pull out. |
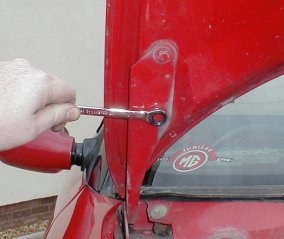
 Using
a 10mm socket undo the two pairs of bolts that secure the bonnet to
the hinges. I used a ratchet spanner (as Tim was using the socket on
the other hinge). This job is best done by two people in order to
avoid the bonnet dropping and potentially damaging the car. Using
a 10mm socket undo the two pairs of bolts that secure the bonnet to
the hinges. I used a ratchet spanner (as Tim was using the socket on
the other hinge). This job is best done by two people in order to
avoid the bonnet dropping and potentially damaging the car. |
 The
bonnet is free of the car and can be lifted clear - thus. The
bonnet is free of the car and can be lifted clear - thus. |
Slam Panel - Removal
 Using
the ratchet, undo the 10mm bolts that secure the upper radiator panel
as shown. Using
the ratchet, undo the 10mm bolts that secure the upper radiator panel
as shown. |
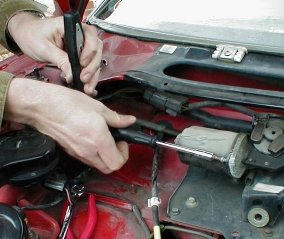
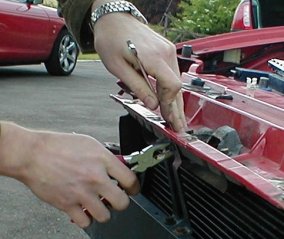
 We
then used a 10mm ratchet spanner and a pair of pliers to remove the
pair of nuts and bolts that secure the panel stay. As an aside, in the
background of this picture you can see Tim's rather nice F and also
the back of my ZS. Tim's F is also a 1996 model and is around 200 cars
older than Scarlet. We
then used a 10mm ratchet spanner and a pair of pliers to remove the
pair of nuts and bolts that secure the panel stay. As an aside, in the
background of this picture you can see Tim's rather nice F and also
the back of my ZS. Tim's F is also a 1996 model and is around 200 cars
older than Scarlet. |
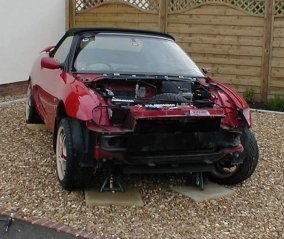
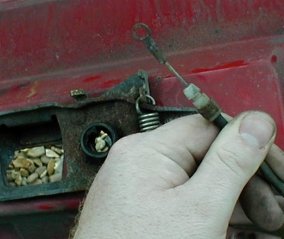
 The
panel is now unbolted, but is still connected to the car by the bonnet
release cable. Turn the panel over and unclip it from it's mounting,
you can now hook it over the release pull. The upper radiator panel is
now free of the car and can be removed. The
panel is now unbolted, but is still connected to the car by the bonnet
release cable. Turn the panel over and unclip it from it's mounting,
you can now hook it over the release pull. The upper radiator panel is
now free of the car and can be removed. |
|
Horn - Removal
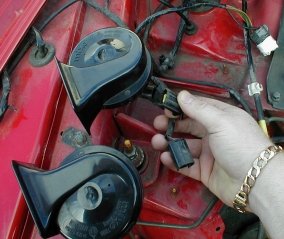
 OK,
on with the gallery, beginning with the horns. I began by
disconnecting the pair of multiplugs as shown. If you have a TF, there
is a good chance that you only have one horn - this is a cost cutting
casualty I'm afraid - the TF is priced at a similar level to the F in
the 1990's and as a result of this highly competitive pricing some
models have lost a couple of 'standard' F items like the extra horn,
the under bonnet light, the map pockets in the back of the seats and
the ignition illumination. The good news is that these parts are
available as spares for the F, so if you feel like a bit of DIY
work... OK,
on with the gallery, beginning with the horns. I began by
disconnecting the pair of multiplugs as shown. If you have a TF, there
is a good chance that you only have one horn - this is a cost cutting
casualty I'm afraid - the TF is priced at a similar level to the F in
the 1990's and as a result of this highly competitive pricing some
models have lost a couple of 'standard' F items like the extra horn,
the under bonnet light, the map pockets in the back of the seats and
the ignition illumination. The good news is that these parts are
available as spares for the F, so if you feel like a bit of DIY
work... |
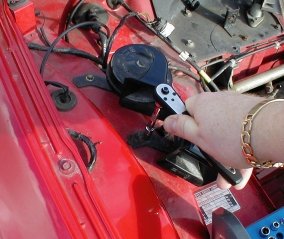
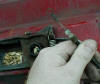
 I
then used an 8mm socket on an extension connected to a ratchet to
remove the retaining bolt that secures the horn bracket. I
then used an 8mm socket on an extension connected to a ratchet to
remove the retaining bolt that secures the horn bracket. |
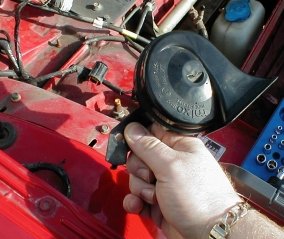
 was
then able to just lift each horn free of the wing. Note that I have
put the retaining bolts back, although I have been separating and
cataloguing the various screws / nuts / bolts etc as I have removed
them, the easiest way to know where each one comes from is to put them
back. was
then able to just lift each horn free of the wing. Note that I have
put the retaining bolts back, although I have been separating and
cataloguing the various screws / nuts / bolts etc as I have removed
them, the easiest way to know where each one comes from is to put them
back. |
|
Heater Duct - Removal
 Tim
actually did this last week, but I didn't take any photographs, so I
put it back again, just so that I could remove it for the gallery!
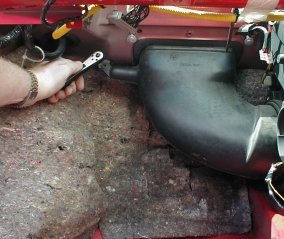
Ain't I good to you? ;-) Using a 10mm socket on a ratchet, remove the
retaining nut as shown. Tim
actually did this last week, but I didn't take any photographs, so I
put it back again, just so that I could remove it for the gallery!
Ain't I good to you? ;-) Using a 10mm socket on a ratchet, remove the
retaining nut as shown. |
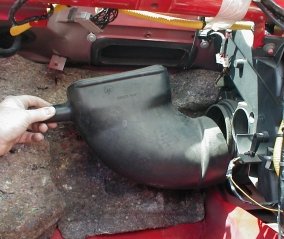
 Then
just drop the duct away, it is just 'push-fit'. OK, OK, so I'm not
THAT good to you.. Then
just drop the duct away, it is just 'push-fit'. OK, OK, so I'm not
THAT good to you.. |
|