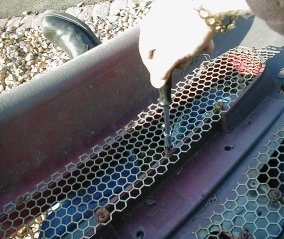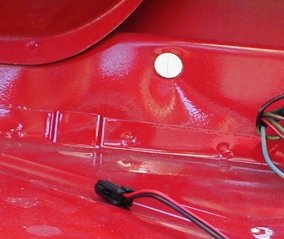
In the boot there are three bolts that retain the rear bumper. To
remove the retaining nuts you will need a 13mm spanner and a lot
of patience! As you can see from the picture the central one is a
pain to get to, furthermore, the length of the bolt precludes the
use of a socket. |

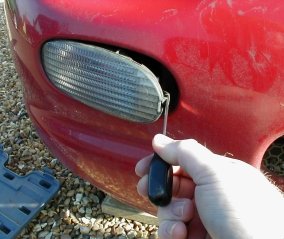
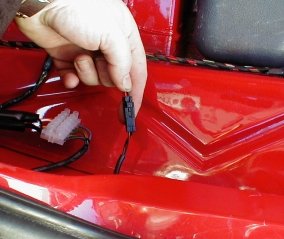
The rear bumper houses a pair of lamps to illuminate the rear
numberplate - these need disconnecting before the bumper can be
removed. It is as simple as unclipping the two multiplugs in the
boot and feeding the gromet and wiring through the hole in the
rear panel. |
In addition to the three 'boot bolts' and the pair of 17mm main
bolts, the bumper is retained with a further three screws in each
wheel arch, 2 that join the wheelarch liner to the bumper (these
were the tricky ones) and a further screw that fixes upwards into
the underside of the rear wing. All are Philips head and I was
able to undo Scarlet's with a 'dumpy' screwdriver and a bit of
brute force! More details on removing the rear bumper can be found
on
Scarlet's Web" |
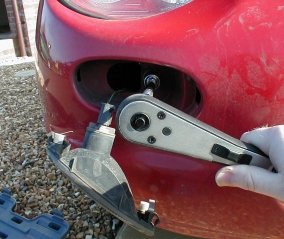
Although disconnected last week, the wiring was still through to
the boot compartment. I pushed the rubber grommets through the
hole in the bodywork (shown in the picture) and then fed the
wiring out so that it wouldn't become damaged when the bumper was
removed |

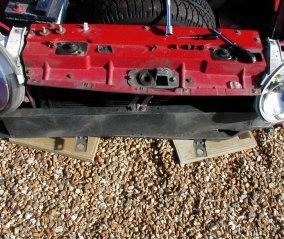
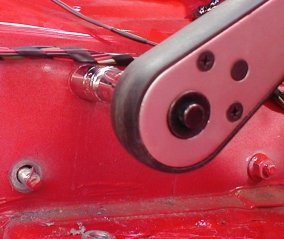
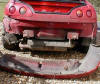
The main bolts that secure the bumper to the car fix to a pair of
box sections that perform the same job as the front armature in an
impact, i.e. progressive collapse. They have captive nuts in the
underside to take the 17mm bolts fixed to a small metal plate that
I managed to completely shear off of both box setions. Actually
this made the job of removing the bumper easier as I didn't need
to undo the bolts! The picture shows one of the bolts and the
sheared plate still attached to the bumper. It also shows the rear
grille I fitted to the bumper a few years back, this has survived
and will be re-used. |
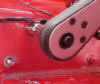
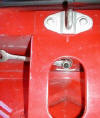
Each of the 2 box sections is fixed through the rear boot wall
with 4 bolts. The bolts have a 10mm head but the nuts inside the
boot compartment are 13mm. I used a 10mm spanner on the outside to
hold the bolt steady and a 13mm socket inside the boot to undo the
nuts. The picture shows the nuts inside the boot - personally I am
amazed this photo came out as I took it 'blind' :-) |
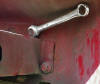
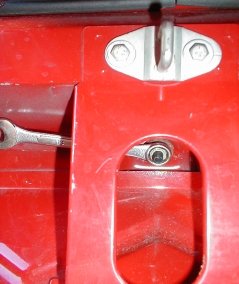
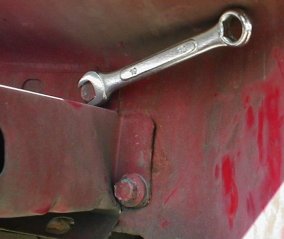
his is the companion photo to the last one and shows the 10mm
spanner being used to hold the bolt steady whilst I undo the 13mm
nut inside the boot with the ratchet. |
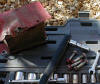
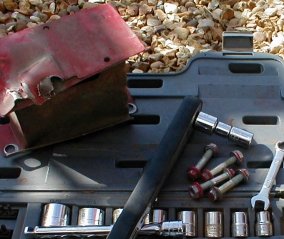
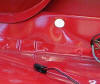
This photo shows one of the rear box sections and the 4 retaining
bolts after it had been removed from the car. Once I had taken it
off I found some surface rust on the bodywork where the box
section was mounted, this is a little worrying as it was
completely hidden until I removed it. |
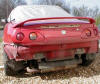
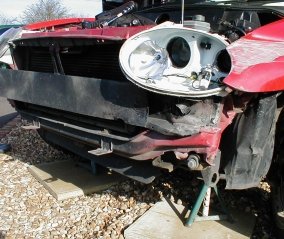
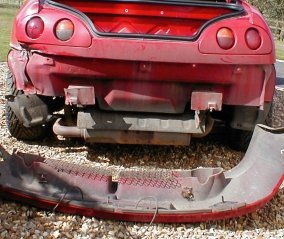
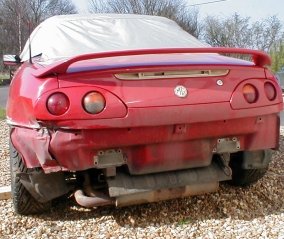
The final picture of the day, a shot of the back of Scarlet sans
bumper and both box sections. Need to add them to the 'Parts
required' section of this site now as they are both beyond repair. |