|
|
Passenger Air Bag Blank - Removal
I began today by removing the passenger air bag blank. The one in
Scarlet was sourced from Mike Satur and is walnut veneered, however
it just clips in in exactly the same manner as a normal one. To
remove, use a flat bladed screwdriver and carefully prise the top of
the blank out of the dash. It is secured with a pair of moulded
'legs' on the bottom and a pair of trim clips at the top. Or the
other way round depending on which way up your blank is |
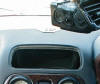
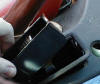
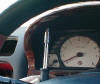
This picture shows the back of the blank and one of the trim clips
(top left of the picture). It also shows the structural cross member
behind the blank in the dash. As you can see it is pretty much
directly behind the blank and this is the reason the space isn't
used for additional cabin storage. |
Centre Air Vent - Removal
I next removed the central, top air vent. You may want to remove this
item in the future as it gives excellent access to the space behind
the fascia which is handy if you are exchanging the head unit, it also
makes it easier to remove the instrument fascia, a job which I will
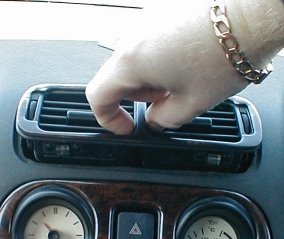
come to in a moment. To remove the top vent, adjust the vanes so that
they are out of the way and grip the vent as shown, then pull (quite
firmly) up and out to release the retaining clips. |
This picture shows the shape of the vent and the opening left in the
dash. As you can see access to the top half of the fascia through here
is excellent. |
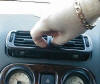
Side
Air Vents - Removal

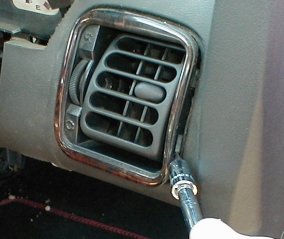
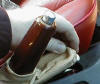
The side air vents have a pair of spring loaded clips on each side.
The first one I removed was on the passenger side, this was very easy
as, with the passenger air bag blank removed, I was able to push it
out from behind. |
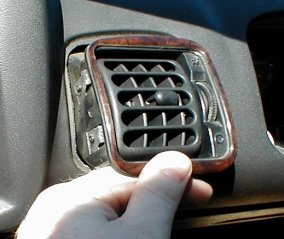
The driver's side vent was a little bit trickier as there wasn't any
access to the back (I suppose you could open the fuse box panel, but I
didn't think of it at the time!) As you can see from the photo, I used
a flat bladed screwdriver to prise out the side of the vent and was
then able to pull it from the front. |
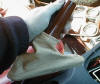
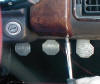
Fascia - Removal
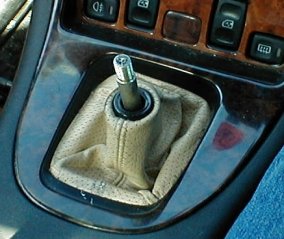
Begin by removing the gear knob. In my case it just unscrewed, but if
for example you have the MG MOMO gear knob, then you will need to
release the grub screw to remove it. |
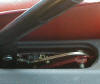
The fascia is retained with 5 trim clips, a pair at the bottom, either
side of the switch panel, a pair further up, either side of the head
unit aperture and a single one right at the top above the hazard
warning light switch. Begin by lifting the bottom of the fascia
upwards and then carefully pull the fascia forwards, out of the dash
at the bottom to release the two lower trim clips either side of the
switch panel. Be careful though as the fascia is made of plastic and
although it will flex quite a lot, don't pull too hard as there is a
point after which it will break. |
I had previously removed my head unit, so the apperture was open
giving easy access to the next set of trim clips. |
Similar to the last picture, this one shows me releasing the other
side. If you think I look a bit awkward, you'd be right! It's not easy
posing for a picture and operating the camera with your left hand :-)
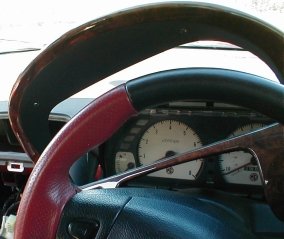
For those eagle-eyed people reading this, yes my clock and oil
temperature gauges ARE the wrong way round. This is a modification I
carried out a while ago, it is very easy to do (in fact I have a
picture later on in this gallery showing the gauge retaining screws in
the back of the fascia) and for me improved the functionality of the
dash. That's a fancy way of saying that I use the oil temperature
gauge all the time and never look at the clock (I am in the habit of
looking at my watch). Also, on a right hand drive vehicle, swapping
the gauges means that both the temperature ones are next to each other
- this for me is more logical. |
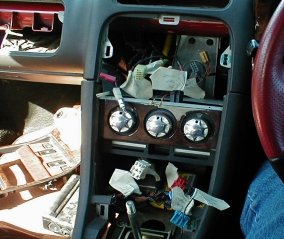
Reach in through the top vent aperture and press out the fascia from
the last trim clip. You then need to release all the multiplugs from
the backs of the various switches. Once this is done you should be
able to slide the gear lever gaiter over the gear lever and the fascia
is now free of the dash. The picture shows what remains, I took some
time now with a roll of masking tape and a biro to label the wiring in
the opening. Whilst I have a pretty good idea which wire goes where, I
am unlikely to be re-fitting the fascia for a while so I thought it
better to be safe than sorry. |
|
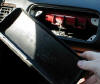
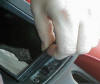
Cigarette Lighter - Removal
On a previous Treffen (a European tour/rally), Dieter wired in the
illuminated ring around the cigarette lighter for me (thanks mate) For
those who don't know, the cigarette lighter in the F/TF comes complete
with an illuminated ring and bulb, but it is not wired in! The picture
shows the wire that Dieter installed, it is a very simple job
consisting of a spade connector, short length of wire and a
scotch-lock connector. I removed the cigarette lighter today and the
following picture shows the components in more detail. |

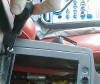
This picture shows the components of the cigarette lighter. To remove
it, just push it upwards from below and disconnect the wiring. Note
the additional wire to the bulb in the orange plastic ring, this is a
very simple modification to get power to the (installed as standard)
illumination ring, just run short length of wire to the fascia and
connect to the lighting circuit. |
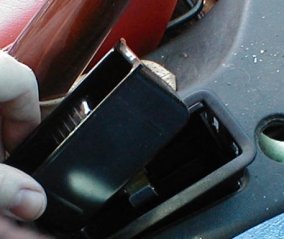
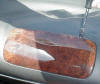
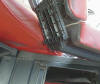
Ashtray - Removal
This picture shows the ashtray parts - it is an 'exploded' view
showing all the parts and the removal process consists of two stages.
To remove, take out the internal part (stage 1) and then use a flat
bladed screwdriver to release the pair of plastic retaining lugs (just
visable in the cigarette lighter end of the ashtray - stage 2). Be
careful, these are easy to break. With these lugs released you should
be able to pull the ashtray surround out of the dash. If you have the
chromed ashtray, this is retained in a different manner. To remove the
chromed ashtray, take out the inner part, then using a Philips head
screwdriver undo the pair of retaining screws in the base of the
ashtray surround. This releases a metal bracket and allows the
surround to be lifted free (carefully, this will be complete with
screws and you don't want to drop them into the transmission tunnel).
Reach into the transmission tunnel and retrieve the bracket. |
|
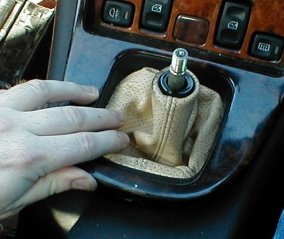
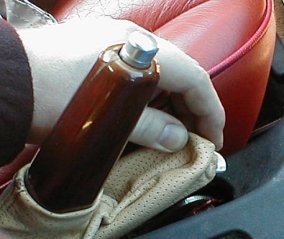
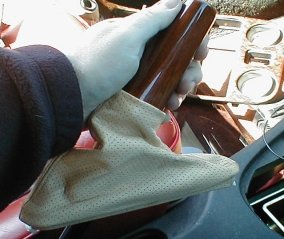
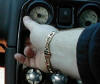
Handbrake Handle and Gaiter - Removal
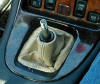
Removing the handbrake handle and gaiter is a really easy job. Begin
by unclipping the front of the gaiter as shown in the picture. Then
slide the bottom of the gaiter forwards to release the rear clip. |
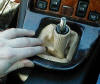
Next, simply slide the handle and gaiter as one item off of the
handbrake, upwards. Easy eh? |
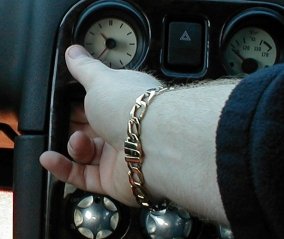
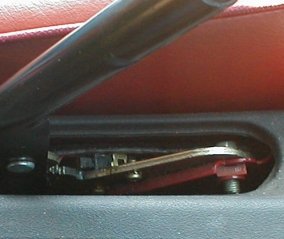
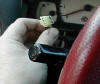
Handbrake Switch - Removal
This picture is just here really out of curiosity. One of the most
annoying things about Scarlet is the handbrake light keeps coming on.
This is caused by the handle working it's way upwards whilst the
vehicle is in motion, just enough to trip the switch (shown in the
picture). I haven't found a long-term cure yet, but I intend to sort
this out during the rebuild |
|
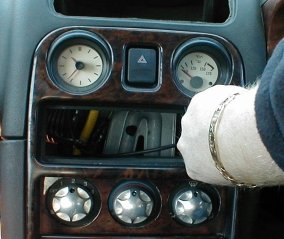
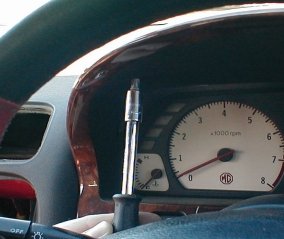
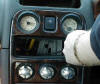
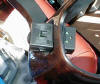
Instrument Cowl - Removal
The instrument cowl is secured with 4 screws, a pair of short ones in
the underside of the binnacle and... |
...a pair of longer ones under the dash. Remove all four using a
Philips head screwdriver. The cowl should be loose now enabling you to
reach behind it and release the multiplugs to the dash illumination
dimmer switch (and also the electric mirror adjuster on later models) |

The cowl is now free and can be removed by pulling it towards you. It
is a little tight in there, but will come free. If you have an
adjustable steering column then it may help to adjust it to the
lowered position. As with the passenger air bag blank, Scarlet's
instrument cowl was sourced from Mike Satur and is veneered in burr
walnut. In all other respect however it is standard so the
aforementioned instructions for removal should apply to all F/TFs. |
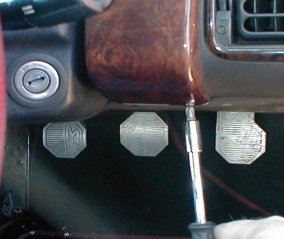
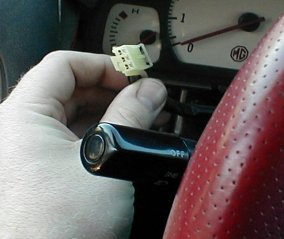
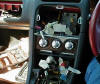
This picture shows the multiplug to the instrument illumination dimmer
switch. For some reason I always find this one the most difficult to
undo, so I thought a picture of the plug would help. |
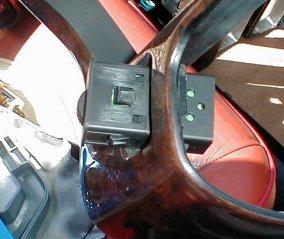
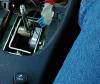
As with all the switchgear, they can be removed from thier mountings
by pushing them out from behind. This picture shows the instrument
illumination dimmer switch, but the technique applies to the switches
in the fascia as well. |
|
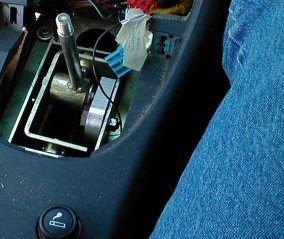
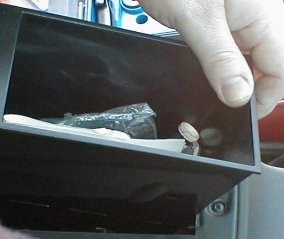
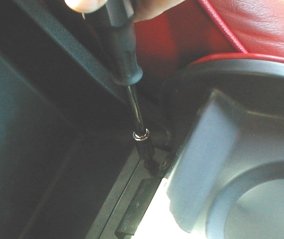
Centre Cubby box - Removal
The hinge that both lids are fastened to is held in place with four
screws. Begin by opening the cubby box lid and unclipping the front of
the storage bin as shown in the picture. |

Pull the front of the storage bin upwards and forwards to release the
rear clips, then withdraw the entire unit. This has revealed the first
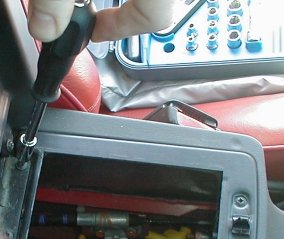
pair of retaining crews that secure the two bin lids. |
Using a Philips head screwdriver, remove the pair of newly revealed
screws as shown in the picture. |
Now open the drop down bin to reveal the remaining pair of screws.
Again using the Philips head screwdriver, undo and remove them. The
pair of lids are now free of the transmission tunnel. |
Lift the pair of lids together away from the transmission tunnel - Job
Done. |
|
|