
Hello and welcome to Spikes guide to fitting Chrome side grills.....starring
Spikes hands.
The grill set used is from Make Satur, but the method of fixing should be similar
to any other set.
This set is purely for the TF.
Watch out for the
to indicate tips along the way as in Haynes manual style.
This is written for anyone with no knowledge at all, so apologies for all the hardened
home mechanics out there who will know most of this.
Right on with the show......
|
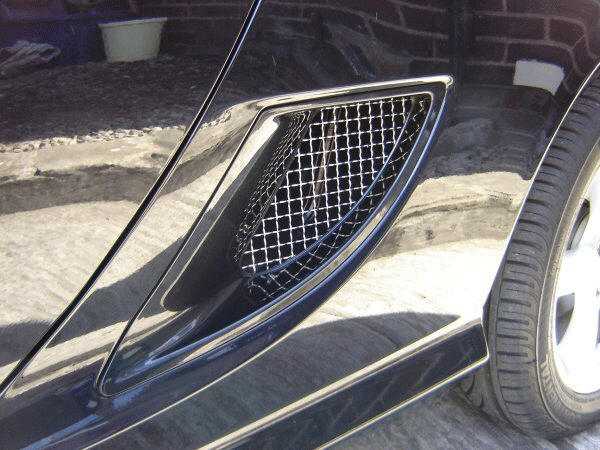
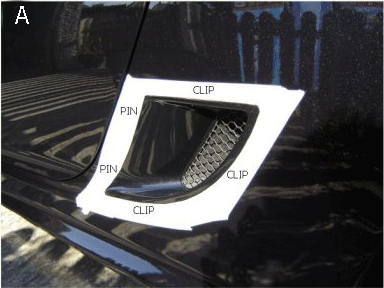
Pic A ....shows the location of all the fastenings that hold the side vent on. There is a clip in the middle at the top, one at the bottom, and one on the rear edge. Also there are two pins located along the forward edge. |
 |
|
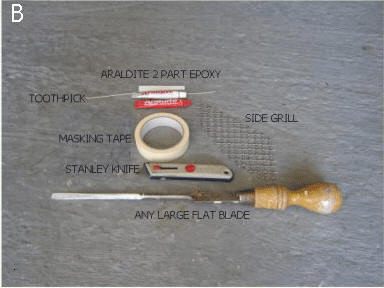
Pic B ....shows all you need to do this job. A grill obviously. Araldite 2 part epoxy from Halfords. Masking tape, again from Halfords. A Stanley knife. A toothpick or similar. A large flat bladed screwdriver or similar (even a spatula!) |
 |
|
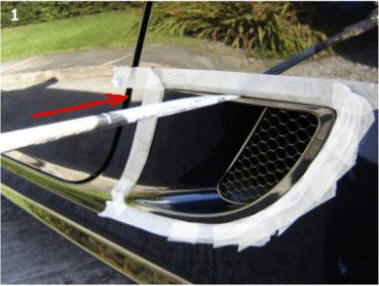
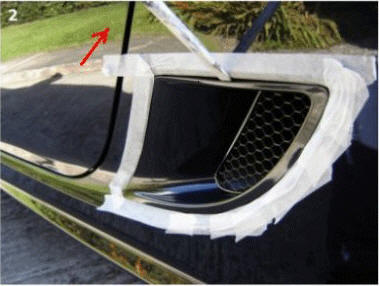
1.Place masking tape around the whole of the side vent making sure it
goes around the lip as well to protect the paintwork. (here's the brown trouser moment) Insert the large bladed screwdriver in the middle of the top edge of the vent carefully. |
 |
|
2.Raise screwdriver handle upwards JUST ENOUGH to released the top clip. The top of the vent will pop out slightly when its released. |
 |
| 3.Pull the forward edge of the vent outwards slowly until both pins are free. | 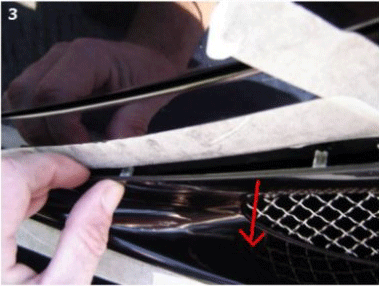 |
|
4.Now lift the vent up slightly to release the bottom clip, and forward
slightly to release the rear clip and withdraw the vent. |
 |
Now have a cup of tea and change your underwear happy in knowledge that you
haven't just wrecked your paintwork. Phew.
|
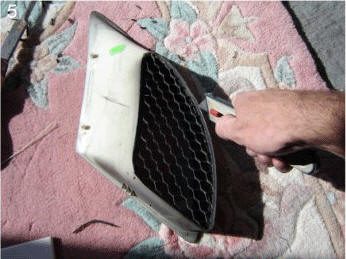
5.Place the vent face down on a piece of carpet to protect the paintwork
on it. Using a Stanley knife, VERY CAREFULLY score around the whole edge of the grill part to help release the silicone sealant used to secure the grill to the vent. |
 |
|
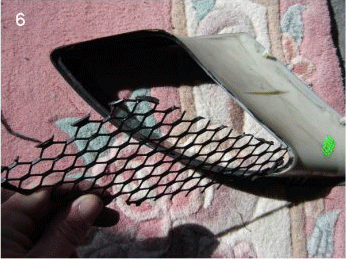
6.Now carefully pull the grill away from the vent. Remove all trace of the silicone sealant from the vent using the side of the knife to "scrape away" what's left. |
 |
| 7.Using the Araldite, squeeze 2 equal lengths of about 2 inches (50mm for you young ones) of epoxy resin and hardener onto a piece of wood, card, or tile. Mix together until its all the same colour. | 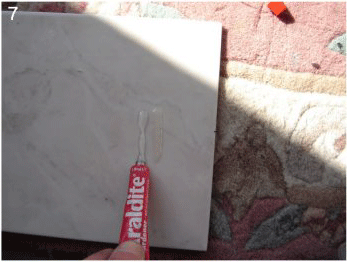 |
|
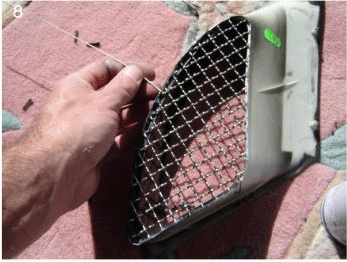
8.Place your new grill onto the vent. Also the grill only fits in one way round so you cant get it wrong. Using the toothpick or similar, place blobs of the araldite you've just mixed onto the ends of each and every piece of wire working. Go around in a clockwise fashion so you don't miss any. Now leave the grill/vent to dry. When touch dry (about an hour) you can refit them carefully. |
 |
| See
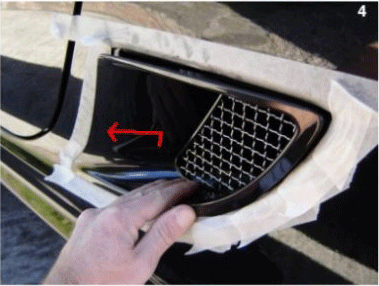
Pic number 4 again. To refit the side vent, place it into the hole bottom first to engage the bottom clip. Now gently push the rear edge of the vent inwards to snap the rear clip in place. Now look at the forward edge of the vent. Line up both pins with their corresponding holes and gently push the forward edge inwards fully. Finally push in the top of the vent to engage the top clip. Now remove all the masking tape and check the paintwork to make sure its ok and the vent is flush with the bodywork on all sides. Breath a sigh of relief. |
 |
Now stand back and admire your new grills....yummy.
Now do all that lot again for the other side!!
Notes.
This guide is for the TF only, the F may be different don't know.
While the vent is off, you can take the opportunity to clean the inner vent
which is only a "push fit", as this is the only time you can get to the damn
thing!
I rate this job a
two spanner rating, most people should be able to do it with no problems.
I also give the side grills a bling rating of
2 shades....suitable for most people, not too blingy, not too dull.
Right I'm off for a well deserved cuppa